This supplement to the Active Directory: Entra ID (formerly Azure) article explains how to create an “application” within Windows Entra ID Active Directory, which is necessary to enable the Workplace Entra ID integration.
The Entra ID Application ID and API Key required to complete the Entra ID integration can be obtained by following the steps below.
Setup
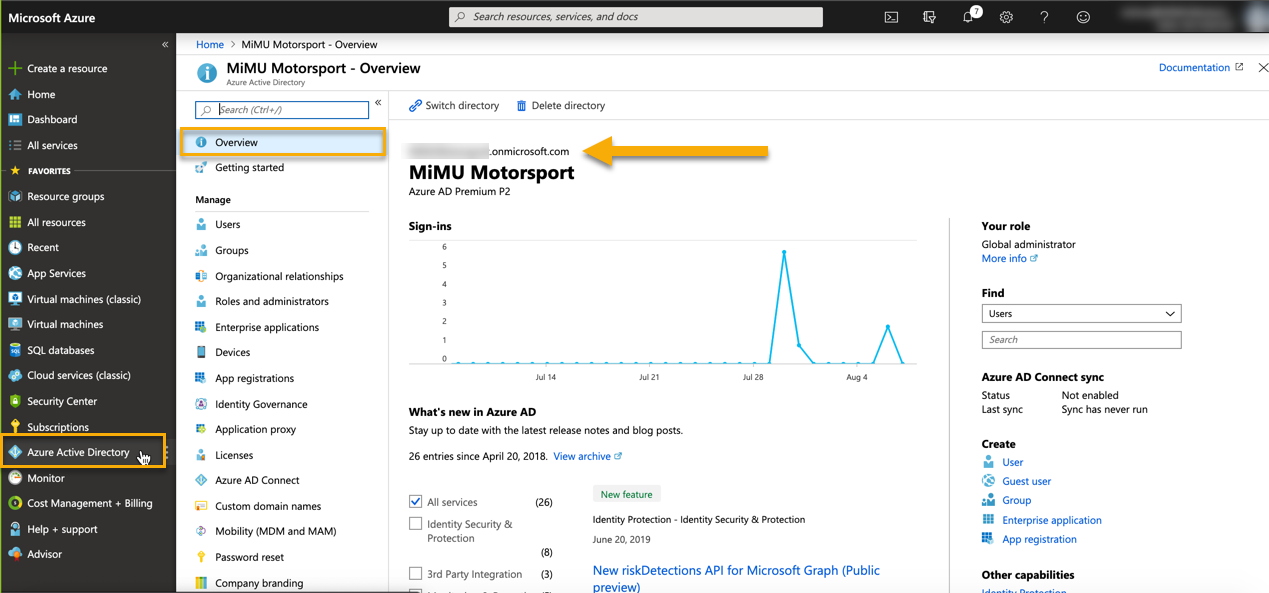
- Log in to Microsoft Entra ID as an administrator and select the appropriate Entra ID directory.
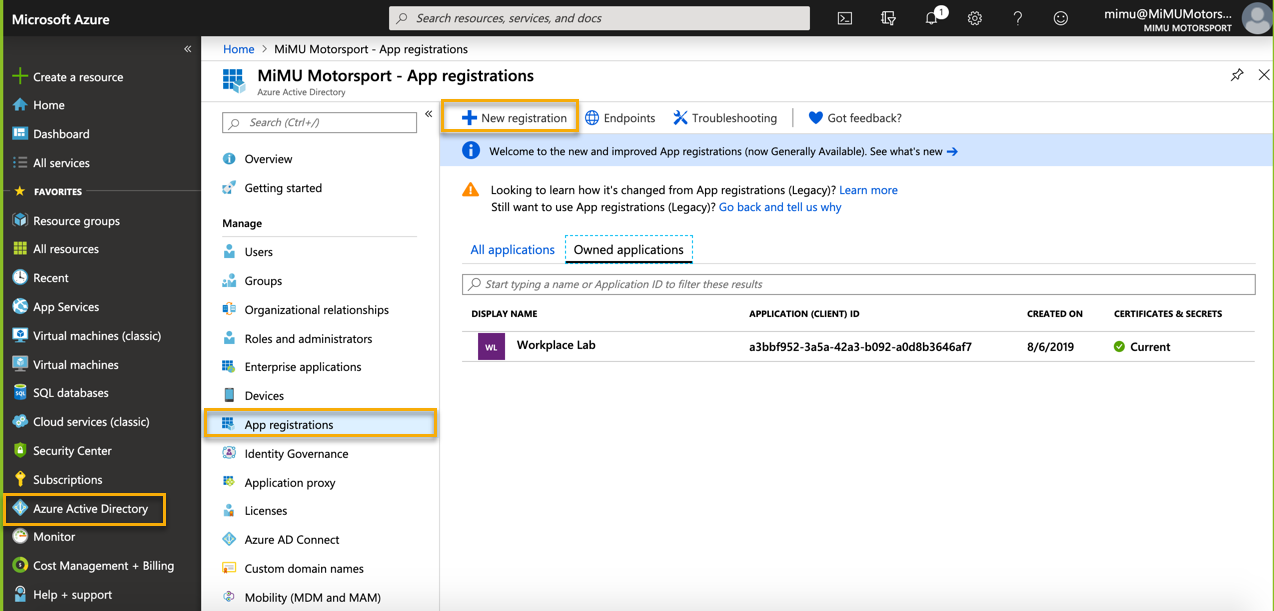
- Select Entra ID Active Directory in the side bar.
- Select the App Registrations option.
- Click + New registration:
-
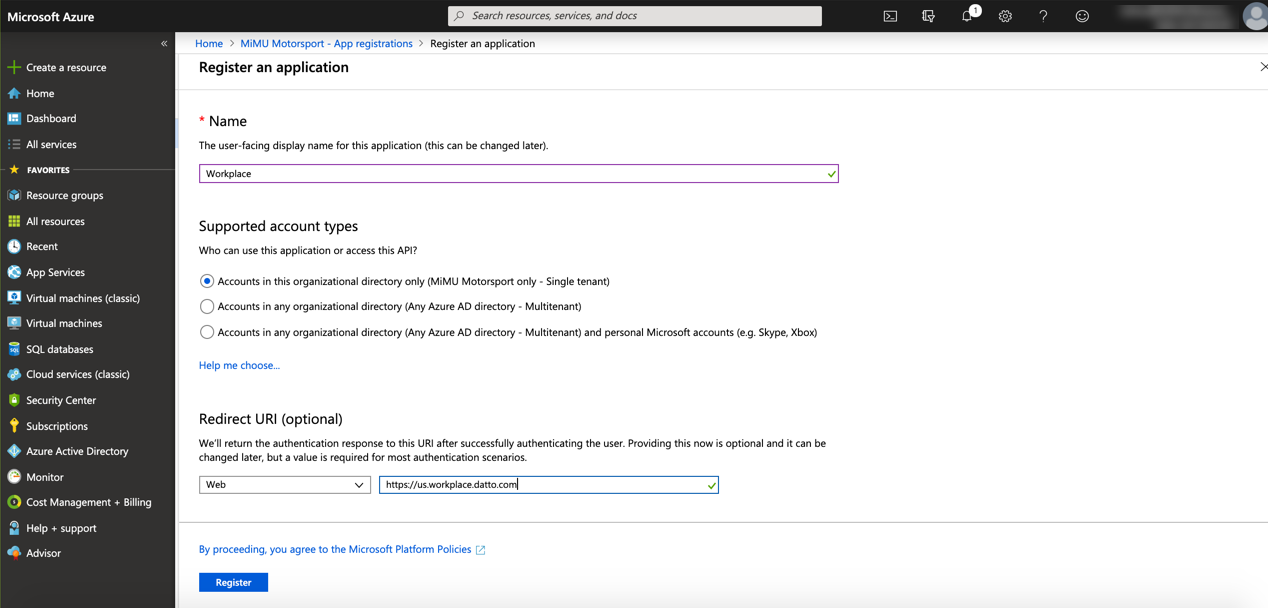
Create the application:
-
Provide a name (Workplace, for example).
- Select the desired supported account type.
- Enter the Redirect URl.
- Click Register.
This field must match the domain part of the URL displayed when logged into the Workplace account with which this Entra ID instance will be integrated and must be one of the following values:
https://us.workplace.datto.com/
https://eu.workplace.datto.com/
https://ca.workplace.datto.com/
https://au.workplace.datto.com/ -
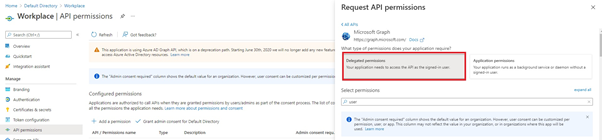
- Under the Manage menu heading, click API Permissions, then click Add a Permission:
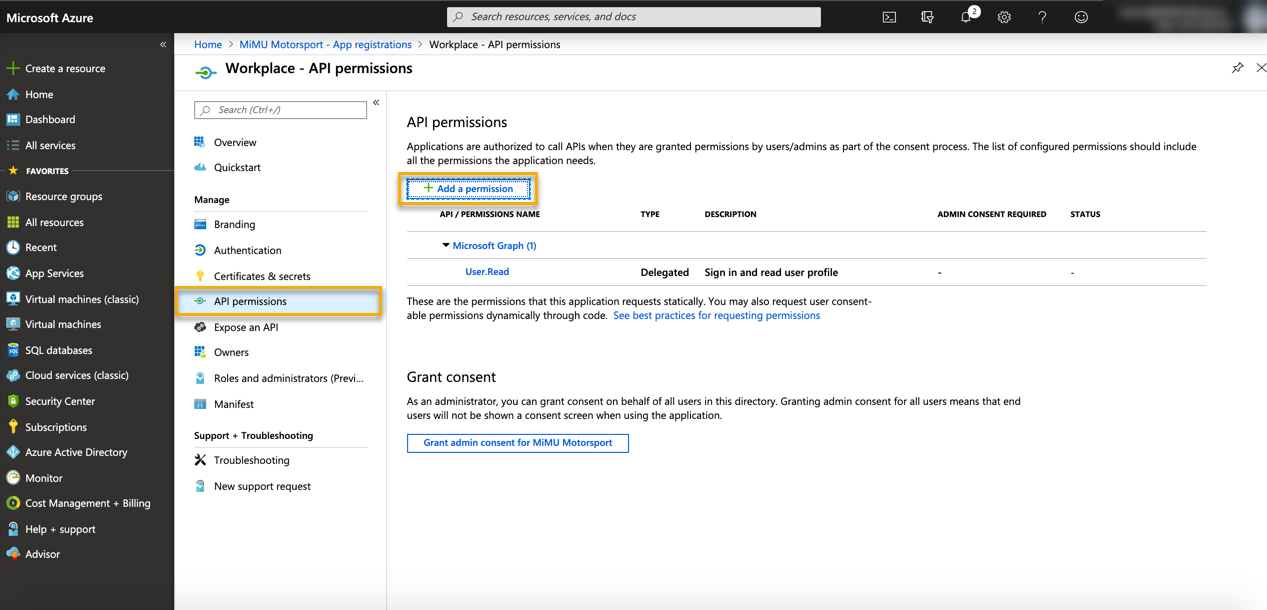
- Click MS Directory Graph:
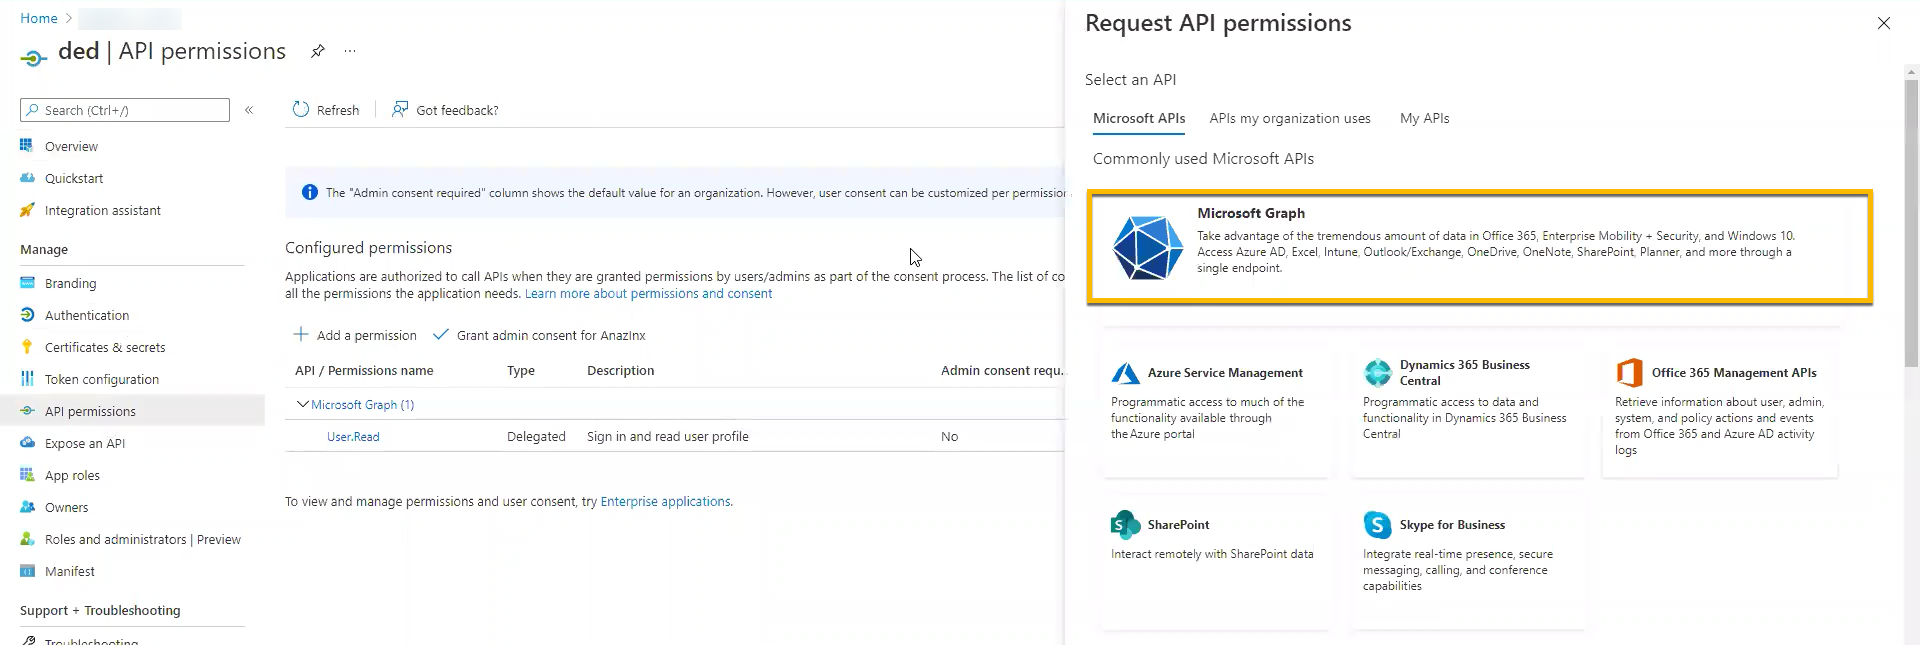
- Configure the permissions:
- Click Delegated permissions and select the User.Read and the Directory.AccessAsUser.All options. Use the filter feature to help you locate the correct options.
- Click Add Permissions.
- On the API Permission view, click Add a permission.
- Click MS Directory Graph.
- Click Application permissions and select the Directory.Read.All option. Use the filter feature to help you locate the correct options.
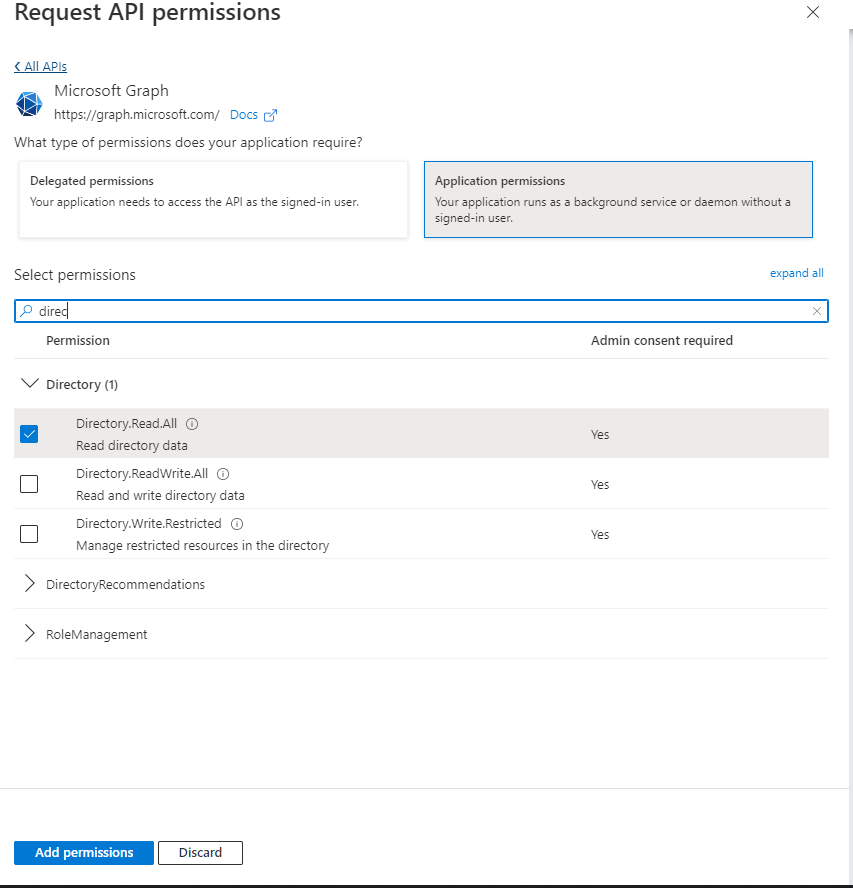
- Click Add Permissions.
- Click Delegated permissions and select the User.Read and the Directory.AccessAsUser.All options. Use the filter feature to help you locate the correct options.
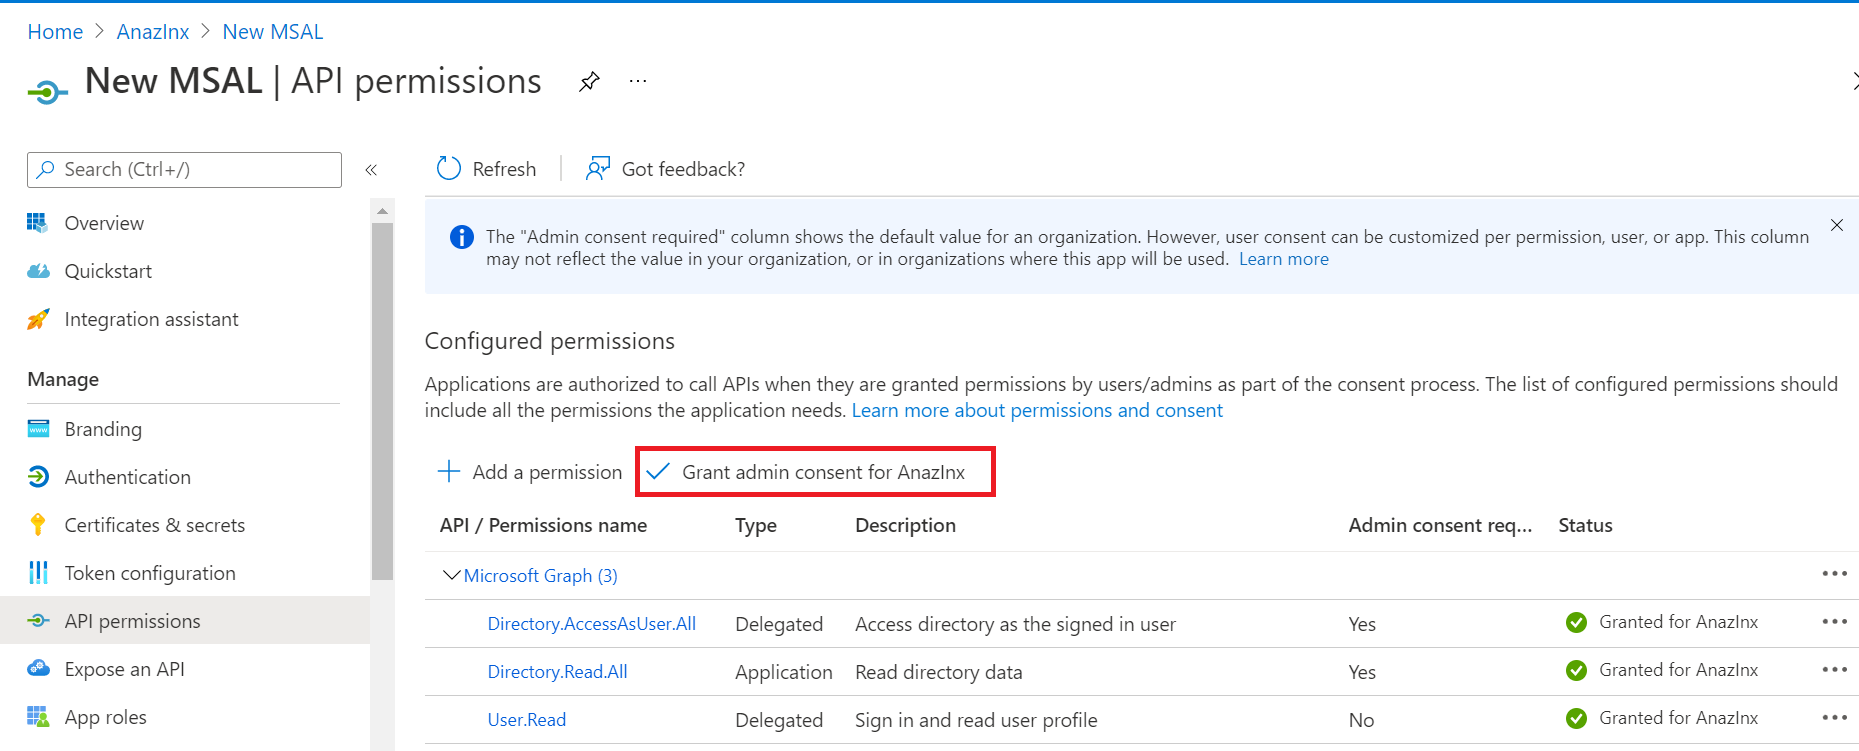
- On the API Permissions view, click Grant admin consent...
- Add a secret:
Under the Manage menu heading to the left of the API Permissions view, click Certificates & secrets, then click + New Client secret.
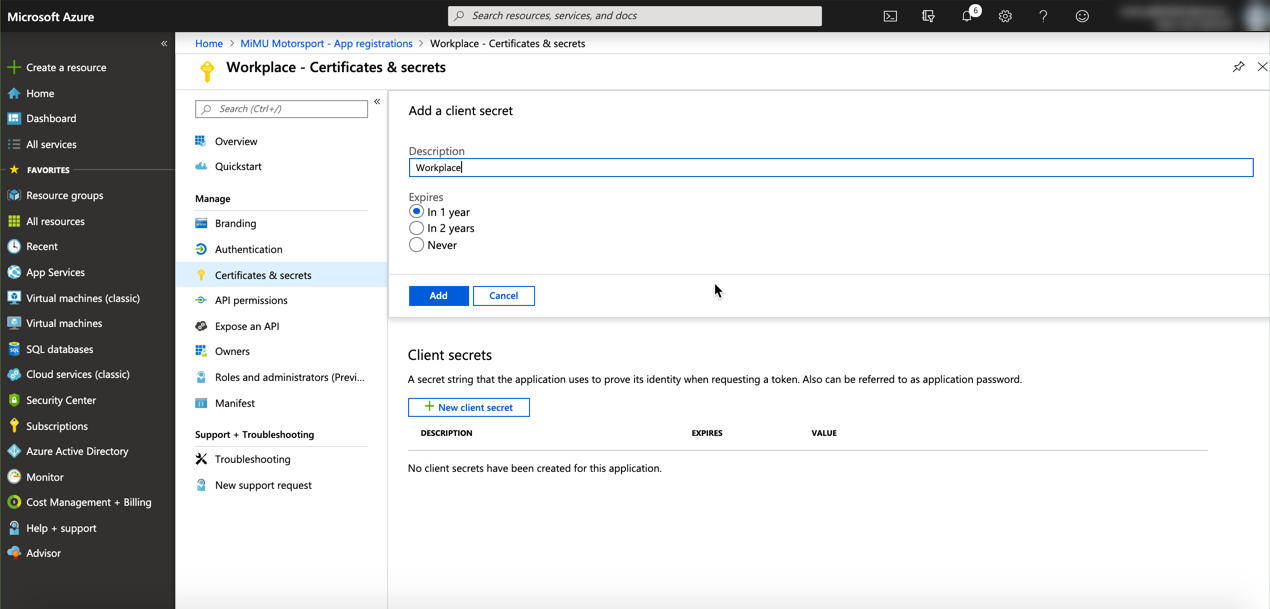
- Provide a description (Workplace, for example).
- Set the desired duration.
- Click Add.
- COPY THE KEY that now appears in the Values column of the Client secrets list at the bottom of the page. The key is required to complete the setup and cannot be retrieved after you navigate away from this blade:

Gather Information
The setup in Entra ID is now complete. Gather the following information and complete the setup within Workplace Online according to the Active Directory: Entra ID (formerly Azure) guide.
Authentication Domain
- Click Entra I
-
Application ID
- Click App registrations under the Manage heading.
- Click the name of the application (Workplace, for example).
- Copy the Application (client) ID.
API Key
Use the key saved in Step 10, above.